Or how I got new bedroom curtains for several thousand pounds... either one...
I've never loved our bedroom curtains. They were shiny and pewter coloured. I didn't hate them, but they didn't really go with anything in our bedroom. The throw on our bed is made out of a similar material, but in orange, so I lived with it.
Old curtains
Shiny close up
But! But. I was secretly always on the lookout for alternative window coverings. I couldn't justify spending too much on replacements as the ones we had were perfectly fine. I kept an eye out, but never saw anything great. Ross sells a fair number of curtains, so I also kept an eye on our inventory for any possible curtains to "steal". No joy. There were some green sheers that would have gone with our bedding, but they were- well- sheer. No bueno.
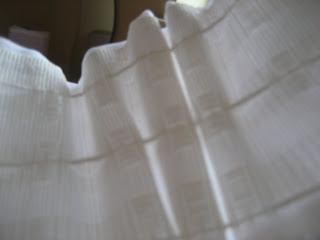
Then, one magical day last week as Ross was unloading the van of items purchased at a recent auction, he brought me a packet and said, "Did you see these?" Oh huzzah! They were white curtains, that were sheer and floaty, but also LINED! They were in a size that fit our window. The angels sang. Well maybe that's an exaggeration. They've got this pattern embroidered on them that I'm not in love with. But I'm not mad at it either. They're fine, but in a much better way than the old curtains were fine. So I call it a win.
Yesterday, I opened the package and gave hanging these babies a whirl. Ruh-roh. They're meant to be used on a drawstring! We've just got a regular old pole. But, not to be deterred, I soldiered bravely onward.
First I dug around in our spare room (the black hole of all crap in our house) to try and find the rings that had come with our curtain rod. We hadn't needed them since our previous curtain was tab top. Since Ross had installed the old curtain before I arrived in England, I knew that the rings would not have been thrown away. Hahhaha! Ross.... throw something away.... hahahahh.... It's ok, I'm ok. I've stopped rolling on the floor with laughter. After just a little digging, I was able to locate the rings. Then, because I've got a mind like a steel trap, I remembered that I'd seen a pack of curtain hooks on the floor in the spare room (probably a sample from something Ross was looking at buying a while back). Haha! Awesome.
Rings!
Random free curtain hooks
This project was going to be completely free! (If you don't count all the money that Ross spent at the auction...) So, I removed the old curtain, settled on the bed with my supplies, and got to work.
Yes, that picture frame is empty.
I noticed this label on one of the panels and had no idea what it meant.
oooh... blurry picture...
I tried to just put a curtain hook through the string at the end of the curtain, but the string pulled free. I figured it would happen, but it was worth a shot...
The string before I put the hook on.
The string after I put the hook on.
So, I pulled all 3 strings loose and started pulling on them. The curtain started to pleat.
I kept pulling, from both ends, until the pleats were pretty tight. I estimated that the curtain width would be ok, even though I had a niggling suspicion that it would be too narrow. I ploughed on and pleated both curtains. (Did anyone else hear that ominous music of foreshadowing?) Then I tied a knot in the strings at each end of the curtain panels.
Pretty pleats!
Next I did some fancy calculations to determine that the hooks should be 11.5 pleats apart. By fancy math, I mean just regular division. And yes, I counted how many pleats there were. Making an executive decision, I alternated between 11 and 12 pleats.
So, after I'd completed my complex mathematical equations, I attached the hooks to the top cord. Here is a series of pictures that shows that process.
Pointy end inserted from the bottom.
Twirl it until the pointy end points down.
Ta-da! You can also see the knot tied in the end of the strings.
Then I slid the ring onto the hook.
Then I repeated that process many many times. (Well 16...)
Then I put the curtains on the rod and hung the rod back up. Ta-da!
Whoops.
Remember that foreshadowing... yep. Too narrow. So I took it all down, undid the knots and loosened the pleats. Then I put the rod back up and... TA DA!
So light and airy!
And open...
Finally, I put a couple of little hooks on the wall, so I could use the matching tie backs that came with the curtains. The first thing I do most mornings is open the curtains and let the light in. I love how the tie backs hold them back and look nice and finished.
Don't they look so much better than the old ones? Here's a night shot.
Wasn't that fascinating?
I bet you were riveted the whole time.
Did you see the plot twist of too narrow panels coming?
What's the cheapest home decor item you've ever used?


very nice. beautiful curtains.
ReplyDeletewtf?
ReplyDeleteA blog about curtains....
ReplyDeleteTo be fair, Anonymous, it's only an entry about curtains. If you're interested in entire blogs about curtains, I recommend this link: http://www.networkedblogs.com/topic/Curtains/
ReplyDeleteDidn't realize this silly little post would be controversial!